
18Dec2023
How To Restore Your Grout And Tile To Their Original Glory
Dirty grout is the biggest thing that prevents the tiles from being glorious. The grout lines between the tiles are known to be penetrable. This means that they are likely to soak up grime, grease and spills. Understanding the correct method of cleaning grout is vital for floors, walls, and counters. Learning how to clean grout will prolong your tile’s life while ensuring it always looks best.
A steam mop with a grout-cleaning attachment can prove to be a perfect choice for tackling grout issues. However, you will need more than that to deal with stubborn stains. To clean it without causing any damage to the fragile tiles and finishes, it is ideal to use homemade cleaners.
Here is how to restore your grout and tile to their original glory with an easy method. It is perfect for keeping your grout lines clean.
1. Remove Loose Dirt
Conducting a pre-restoration cleaning session is important to eliminate the visible dirt and debris swiftly. Budget bond cleaners Gold Coast recommend using tools like a vacuum cleaner that is equipped with a specific soft brush attachment. It will help thoroughly eliminate loose dust, debris, and other particles. Pay special attention to corners and crevices as they are more likely to accumulate dust. This preliminary step ensures the surface is prepared for the following grout-cleaning process. It will facilitate the piercing of the cleaning solution into the grout lines, guaranteeing a better result.2. Prepare an Effective Cleaner
For the best possible results, you will need to pick a combination that suits the requirements of your surfaces. There are plenty of cleaning solutions you can prepare at home. For example, a solution made through a mixture of water and baking soda is a gentle yet powerful cleaner that works on most tile types. There is also another option, which consists of ingredients such as water and vinegar. It offers an exceptional acidic choice to tackle stubborn stains and grime. Such solutions are often used for budget bond cleaning Gold Coast. Remember to conduct a patch test of your preferred DIY solution to confirm it is compatible with the surface type. Make a few adjustments to the cleaner according to the stain’s severity. It is highly recommended to avoid commercial grout cleaners as they contain chemicals and might cause negative reactions. Most of them are not effective as well and cause health issues.3. Apply the DIY Cleaner
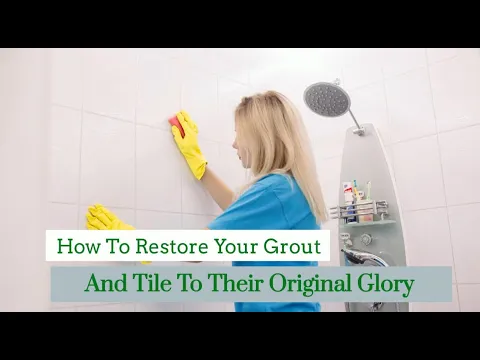
Use an old toothbrush or sponge to apply your preferred cleaning solution to the tile surface and grout lines. After application, the cleaner will effectively break through the stains and dirt. Make sure the solution evenly covers the complete surface. During application, you must focus mainly on specific areas that have significant discolouration and grime buildup. Let the solution sit there for a few minutes before proceeding further. It will loosen the stain, facilitating easy removal.4. Scrub the Grout Lines
Professional bond cleaners Gold Coast recommend utilising an old toothbrush or a specialised grout brush to scrub the grout lines. Both these tools are ideal for this purpose, making way for precision in targeting stubborn spots.- Focus primarily on spots that have deep-rooted grime and mould growth.
- Remember to scrub in circular motions.
- Apply gentle pressure to effectively lift the dirt without doing any damage to the tiles or grout.
- Every now and then, take breaks to evaluate progress and reapply the cleaner if needed.